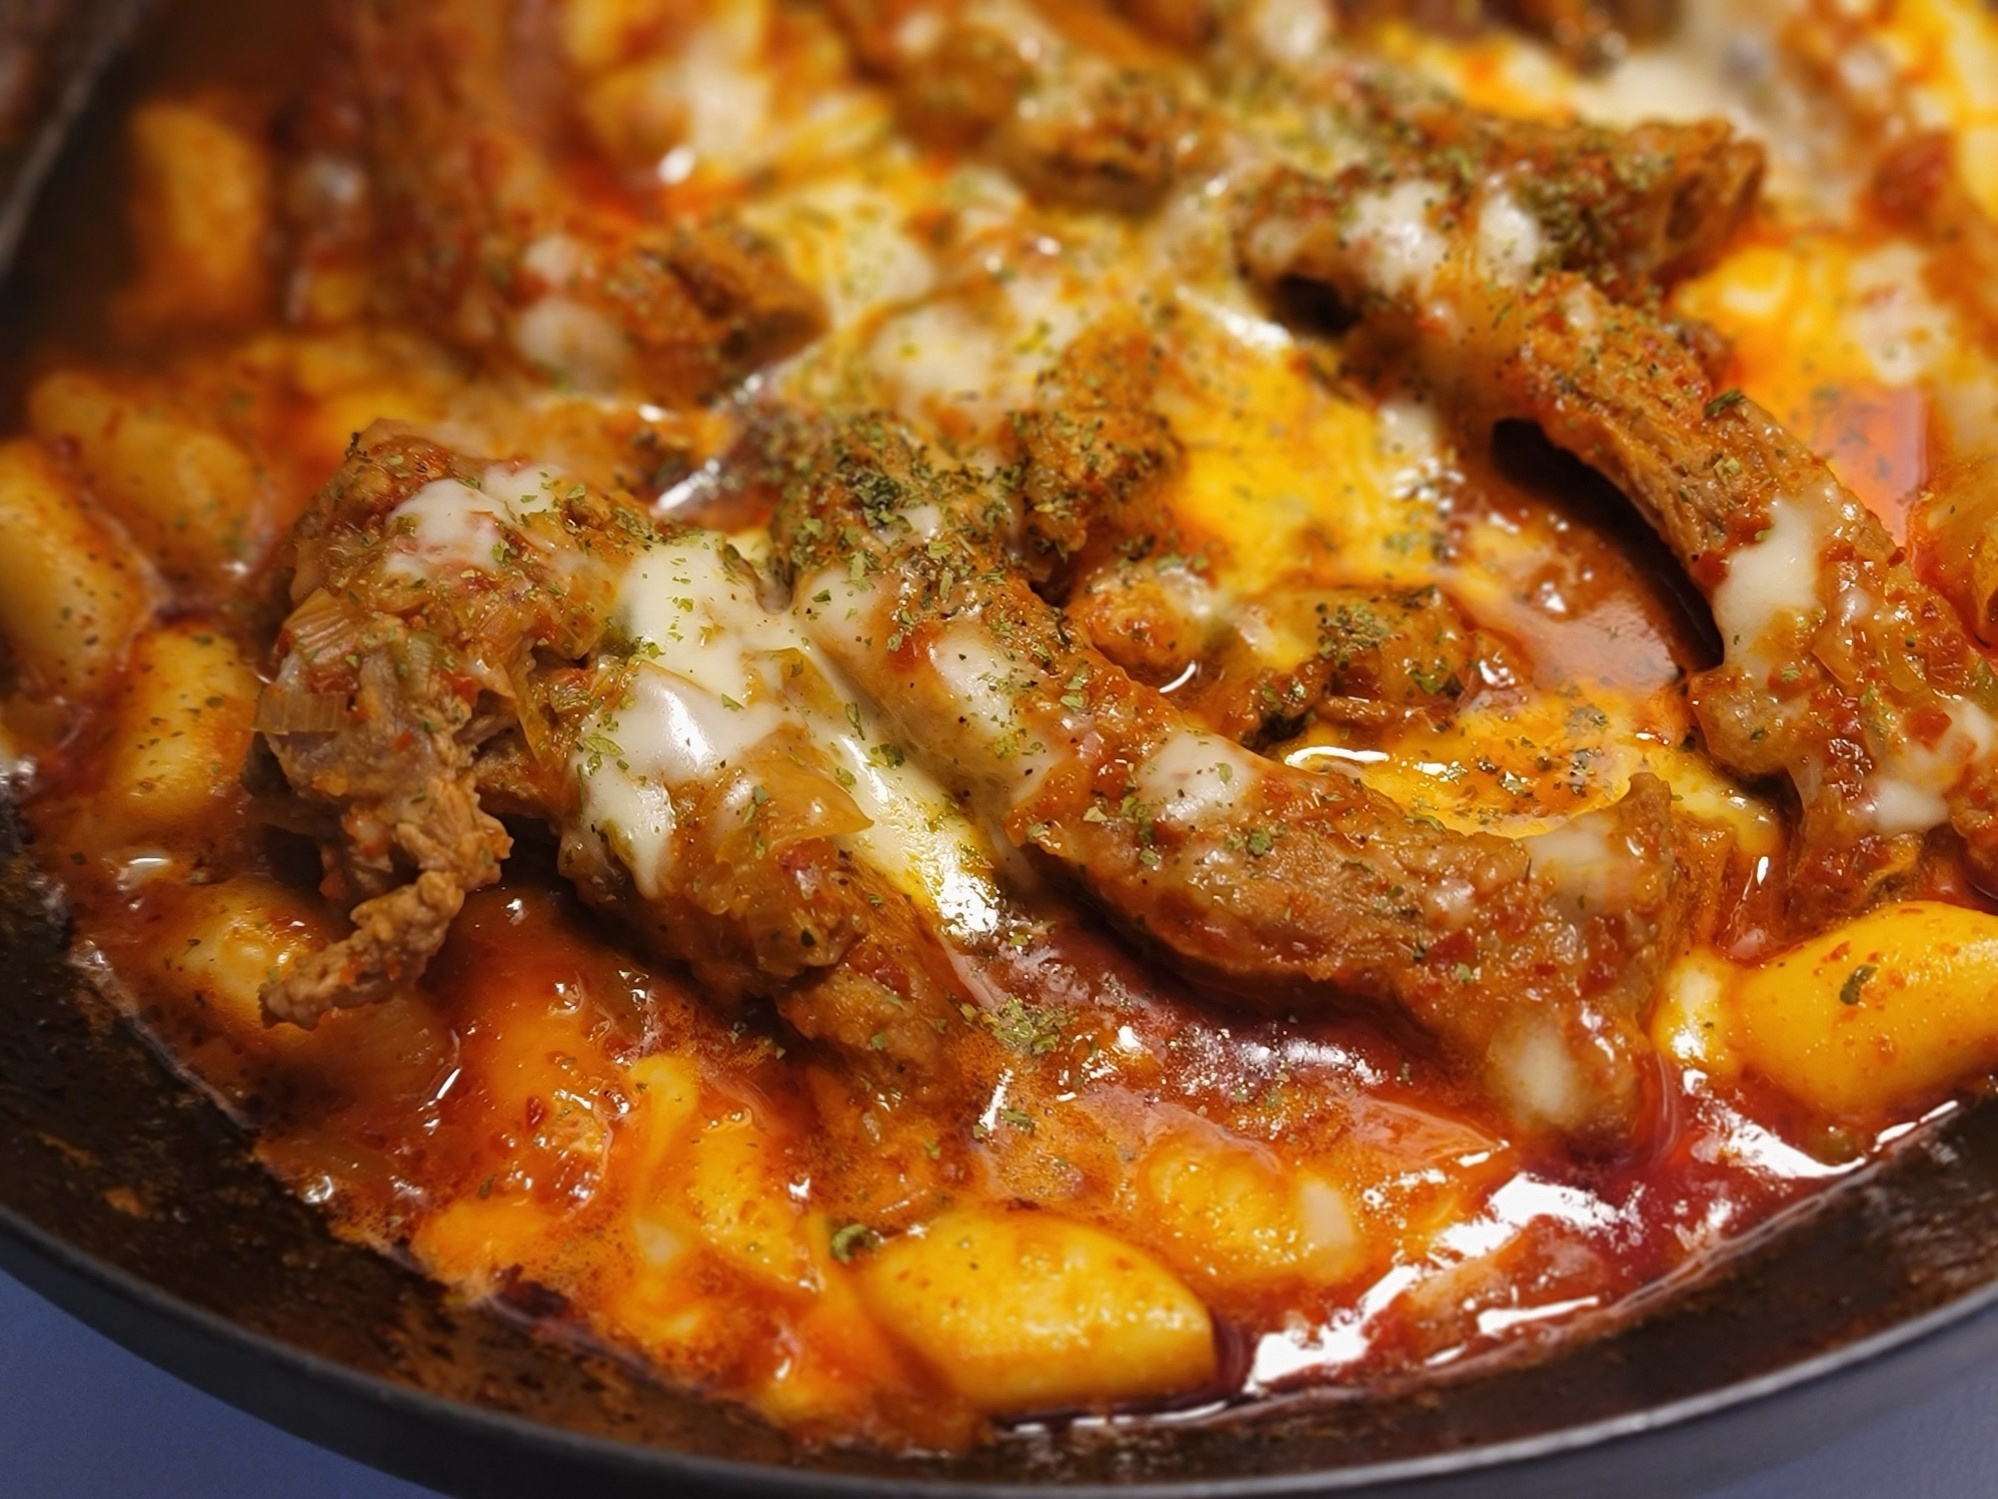
• Spicy Cheese Back‑Rib Stew: “매콤한 치즈 등갈비찜”

    If you’d like to introduce a richly flavorful Korean dish to your international blog readers, here’s a detailed blog‑style post for Spicy Cheese Back‑Rib Stew (매콤한 치즈 등갈비찜) — a sumptuous fusion of hearty pork back ribs, fiery seasoning and melty cheese.

    🍖 Why this dish shines

    • Back ribs (등갈비) are prized in Korean cooking for their tender texture and rich flavour.

    • The spicy seasoning adds a bold kick, which many international readers will find exciting.

    • Adding cheese gives a trendy, indulgent twist — it appeals to both Korean‑food lovers and those who love fusion comfort food.

    • It’s a communal, shareable dish — perfect for gatherings, parties, or cozy meals.

    • Through this post, you’re introducing readers not only to a recipe but to a cultural moment: enjoying fun, hearty Korean food.


    🛒 Ingredients (for about 4 servings)

    Here’s a guideline you can convert to cups/ounces depending on audience preference.

    • Pork back‑ribs (등갈비) ~ 1.5 kg (≈ 3.3 lbs)

    • Water + aromatics for blanching/initial cooking:

      • Water (enough to cover ribs)

      • Fresh ginger slice (≈ ½ tsp minced)

      • Whole peppercorns (e.g. ~½ tsp)

      • Optional: a little cola or soda can sometimes be used to help tenderize and sweeten slightly.

    • Vegetables:

      • Onion (1 medium)

      • Carrot (½)

      • Large green onion (½)

      • Optional: mushrooms, potato, etc.

    • Spicy seasoning base:

      • Korean red pepper powder (고춧가루) ~ 1–2 Tbsp (adjust for heat)

      • Soy sauce (진간장) ~ ½–1 cup (depending on amount)

      • Sugar / or a sweetener (설탕) ~ 2–3 Tbsp

      • Mirin or Korean cooking wine (맛술) ~ 2‑4 Tbsp

      • Minced garlic ~ 1‑2 Tbsp

      • Optional: oyster sauce (굴소스) 1 Tbsp, for umami.

      • Water/broth ~ 2‑3 cups to help simmer.

    • Cheese topping:

      • Mozzarella or a cheese that melts well, ~150‑200 g (5‑7 oz)

    • Garnish: chopped green onion, sesame seeds, maybe fresh chilli slices if you like extra heat.


    👩‍🍳 Step‑by‑Step Preparation

    1. Prepare the ribs

      • Remove excess fat, rinse ribs under cold water.

      • Optional: soak in cold water for ~30 mins to draw out impurities.

      • Blanch the ribs: in a large pot, bring water + ginger + peppercorns (and optionally a splash of cola or soju) to a boil, add ribs and simmer for ~10–15 mins, then drain and rinse. This helps remove excess blood and unpleasant smell.

    2. Make the seasoning/stewing sauce

      • In a bowl, mix together soy sauce, sugar, cooking wine, garlic, red pepper powder, oyster sauce, and some water/broth until well combined.

      • Adjust the amount of red pepper powder depending on how spicy you want it.

      • You can also blend half an onion + half a green onion + a touch of fresh ginger for extra flavour.

    3. Simmer the ribs

      • Return the blanched ribs to the pot. Pour in the sauce, add onions, carrots, and other vegetables you like.

      • Bring to a boil, then reduce to medium/low heat, cover and simmer ~30‑40 mins until the meat is tender and the sauce has reduced somewhat and stuck to the ribs. For example, a version using 1 L water and other ingredients took about 1 hour 40 mins for 4 servings.

      • Check and spoon sauce over the ribs occasionally so the flavour is absorbed evenly.

    4. Final touches and cheese topping

      • When the ribs are tender and sauce is thick, turn off the heat.

      • Transfer ribs into an oven‑safe or heat‑proof pan (if your stovetop pot isn’t oven‑safe).

      • Sprinkle the shredded mozzarella (or your chosen melting cheese) evenly over the top.

      • If using an oven or broiler: put under the grill for a few minutes until the cheese is bubbly and golden. If you don’t have oven access, cover the pot with a lid off‑heat and let the residual heat melt the cheese, though it may not brown as much.

      • Garnish with sesame seeds, chopped green onion and optionally fresh chillies.

    5. Serve

      • Serve hot. Encourage your guests to pull apart the ribs, dip into the sauce, and savour the combination of tender meat + spicy sauce + molten cheese.

      • Pair with steamed rice (밥) and maybe a simple vegetable side or kimchi to balance.


    🌍 Cultural Notes for Your International Readers

    • In Korea, back‑ribs dishes like this are often shared among friends/family, especially at gatherings or when people want to “feast”.

    • The combination of spicy + sweet/ savoury soy‑based sauce + cheese reflects how Korean cuisine often blends strong and comforting flavours.

    • Using cheese is a relatively modern twist (fusion/slight Korean Western‑style) but very popular in Korean “chimaek” (치맥 – chicken + beer) or BBQ scenes. So your audience gets both traditional meat preparation and a trendy twist.

    • You can mention that pulling meat off the bone, dipping into sauce, then enjoying with melted cheese creates an interactive, fun dining experience — perfect for social meals.

    • Encourage trying adjustable heat: if they’re not used to spicy food, start with less red‑pepper powder and maybe include a mild cheese.


    🔧 Tips & Variations

    • Heat level adjustment: Use less 고춧가루 (red pepper powder) or substitute some with paprika for a milder heat; you can also reduce/add chilli flakes or fresh chopped chillies.

    • Vegetables: You can add mushrooms (shiitake, enoki), potatoes, or even sweet potato to soak up sauce.

    • Cheese variations: Cheddar, provolone or a mix of mozzarella + cheddar could be used depending on taste and availability.

    • Make‑ahead: You can prepare the ribs till step 3 ahead of time, refrigerate, and then when ready to serve, reheat, add cheese and finish.

    • Serving style: For an international audience, you might serve this with a side salad or steamed vegetables rather than just rice, to make it more balanced.

    • Dietary note: If someone doesn’t eat pork, you could experiment with beef back‑ribs or even chicken (though taste & cooking time differ). Also, if dairy‑free, omit cheese and maybe finish with roasted sesame + seaweed flakes for texture.

  • Yukhoe Bibimbap – Korean Raw Beef Mixed Rice Bowl

    If you’re looking for a luxurious twist on classic Bibimbap, Yukhoe Bibimbap (육회비빔밥) is a must-try. It’s a vibrant Korean rice bowl topped with seasoned raw beef (yukhoe), vegetables, a raw egg yolk, and spicy-sweet gochujang. Elegant, fresh, and full of flavor, this dish brings together tradition and refinement in one bowl.

    What is Yukhoe?

    Yukhoe is Korean-style beef tartare, typically made with thinly sliced raw beef seasoned with sesame oil, garlic, soy sauce, sugar, and pear. It’s tender, savory, slightly sweet, and traditionally enjoyed as a delicacy. In Yukhoe Bibimbap, it’s served over warm rice with various vegetables, making a perfect balance of textures and flavors.

    Ingredients (1–2 servings)

    For the Yukhoe (Raw Beef):

    • 100g (3.5 oz) fresh beef tenderloin or sirloin (very cold)

    • 1 tsp sesame oil

    • ½ tsp soy sauce

    • ½ tsp sugar or honey

    • ½ tsp minced garlic

    • 1 tsp sesame seeds

    • Thin slices of Korean pear (optional but traditional)

    • 1 egg yolk (fresh, raw)

    For the Bowl:

    • 1 bowl of warm steamed white rice

    • Carrot (julienned, sautéed)

    • Zucchini (julienned, sautéed)

    • Bean sprouts (blanched and seasoned)

    • Spinach (blanched and seasoned)

    • Shiitake or oyster mushrooms (sautéed)

    • Gochujang (1 tbsp, or to taste)

    • Sesame oil (1 tsp for finishing)

    Instructions

    1. Prepare the Yukhoe:

      • Freeze the beef for about 30 minutes until firm for easier slicing.

      • Slice into thin matchstick-like strips.

      • Season with sesame oil, soy sauce, garlic, sugar, and sesame seeds. Add pear slices if using. Chill until serving.

    2. Cook and season the vegetables:

      • Sauté carrots, zucchini, and mushrooms separately with a little oil and salt.

      • Blanch bean sprouts and spinach, then season with sesame oil and garlic.

    3. Assemble the bowl:

      • Place warm rice in a bowl.

      • Arrange the vegetables neatly around the top.

      • Add the seasoned raw beef in the center.

      • Place a raw egg yolk on top of the yukhoe.

      • Drizzle with a little sesame oil and serve gochujang on the side or on top.

    4. How to Eat:

      • Mix everything thoroughly with a spoon, blending the beef, yolk, veggies, rice, and gochujang. Enjoy the rich, savory, slightly sweet taste in every bite!

    Tips & Safety

    • Use only high-quality, fresh beef from a trusted source for raw consumption.

    • Serve immediately after preparation and keep the beef cold until serving.

    • If raw egg is a concern, you can use a pasteurized yolk or omit it.


    Yukhoe Bibimbap is a beautiful mix of textures—tender beef, crunchy veggies, soft rice, and silky yolk—all seasoned perfectly. It’s a Korean delicacy you can enjoy at home, especially for a special meal or to impress guests with something truly unique.

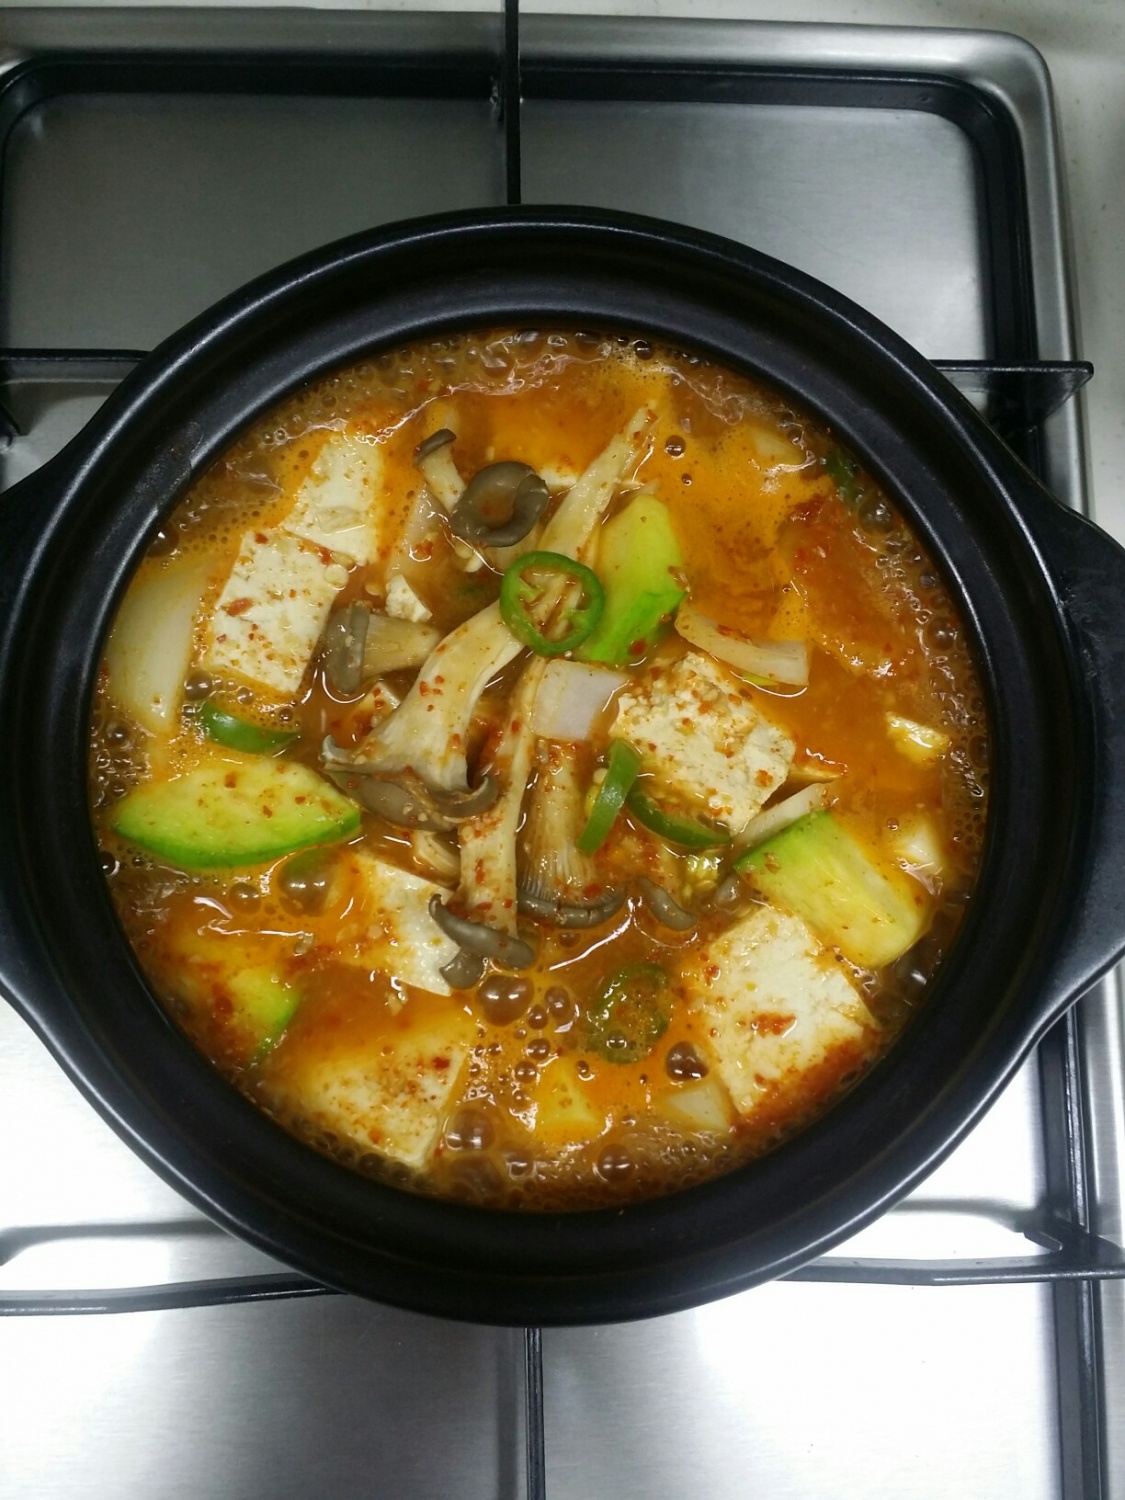
  • Beef Doenjang-jjigae – A Hearty Korean Stew with Deep Flavor

    If you’re in the mood for a rich and comforting Korean dish, Beef Doenjang-jjigae (소고기 된장찌개) is a perfect choice. This variation of Korea’s classic soybean paste stew brings together tender beef, savory fermented paste, and hearty vegetables—all in one delicious pot.

    What is Doenjang-jjigae?

    Doenjang-jjigae is a traditional Korean stew made with doenjang (fermented soybean paste). It’s a staple of Korean home cooking, known for its deep umami flavor and warming qualities. Adding beef makes it extra satisfying and ideal for a full meal.

    Ingredients (2–3 servings)

    • 150g (5 oz) beef brisket or stew meat, sliced

    • 2 tbsp Korean doenjang (soybean paste)

    • 2½ cups water or anchovy-kelp broth

    • ½ onion (sliced)

    • ½ zucchini (sliced)

    • ½ potato or radish (chopped)

    • ½ block tofu (cubed)

    • 1 green chili or hot pepper (optional)

    • 1 garlic clove (minced)

    • 1 scallion (sliced)

    • Sesame oil (1 tsp, optional for beef)

    • Black pepper to taste

    Cooking Instructions

    1. Sauté the beef: In a pot, lightly sauté the sliced beef with a bit of sesame oil until browned. This adds flavor to the base of the stew.

    2. Add water or broth: Pour in your broth or water and bring it to a boil. Simmer for 10 minutes so the beef softens.

    3. Mix in doenjang: Dissolve the soybean paste in a ladle with hot broth, then stir it back into the pot.

    4. Add vegetables: First add potato or radish, then onion, zucchini, and tofu. Let it simmer another 7–10 minutes until everything is tender.

    5. Finish with aromatics: Add minced garlic, chopped scallions, and optional chili. Simmer for 1–2 more minutes.

    Tips for Success

    • Use brisket or shank cuts for tenderness.

    • For richer flavor, use anchovy-kelp broth instead of plain water.

    • Adjust the saltiness by adding more broth or water near the end if needed.

    How to Serve

    Beef Doenjang-jjigae is best served bubbling hot, with freshly steamed white rice and traditional Korean side dishes (banchan). It’s not just a meal—it’s comfort in a bowl, perfect for cold days or when you’re craving something deeply savory.

  • How to Make KOREA Kimchi Stew

    The Heart of Korean Home Cooking

    🥢 Introduction

    Kimchi Stew, or Kimchi Jjigae (김치찌개), is one of Korea’s most beloved comfort foods.
    It’s spicy, hearty, and full of flavor — perfect for a cozy meal at home.
    Even if you’ve never cooked Korean food before, don’t worry!
    This easy recipe will help you make delicious kimchi stew in just 20 minutes.


    🍲 Ingredients (2–3 servings)

    • 1 cup of ripe kimchi (chopped)
    • ½ cup of pork belly or tuna (optional)
    • 1 tablespoon of gochugaru (Korean red chili flakes)
    • 1 tablespoon of gochujang (Korean chili paste)
    • 1 tablespoon of soy sauce
    • ½ onion (sliced)
    • 1 block of tofu (cut into cubes)
    • 2 cups of water or broth
    • 1 teaspoon of sesame oil
    • 1 green onion (chopped)

    🔥 How to Make It

    1. Fry the pork and kimchi together in sesame oil for 3–4 minutes until fragrant.
    2. Add gochugaru, gochujang, and soy sauce, and stir well.
    3. Pour in water or broth, then bring to a boil.
    4. Add onion and tofu, and simmer for 10–15 minutes on medium heat.
    5. Finish with green onion on top and serve hot with steamed rice.

    💡 Tips

    • The older the kimchi, the better the flavor!
    • If you’re vegetarian, skip the meat and use vegetable broth.
    • Add a small spoon of sugar to balance the sourness if your kimchi is too strong.

    ❤️ Closing

    That’s it! You’ve just made authentic Korean Kimchi Stew at home.
    It’s spicy, warm, and deeply satisfying — the perfect dish to share with friends or family.

  • KOREA Kimchi Fried Rice

    A Simple Taste of Korea You Can Make at Home

    🥢 Introduction

    If you love Korean food but think it’s hard to cook, don’t worry!
    Kimchi Fried Rice (Kimchi Bokkeumbap) is one of the easiest and most delicious Korean dishes you can make — even if you’re a beginner. It’s spicy, flavorful, and full of umami from the kimchi and a touch of sesame oil.

    Whether you live abroad or just want to bring a bit of Korean taste to your kitchen, this recipe will show you how to make it in less than 15 minutes!


    🍚 Ingredients (1–2 servings)

    • 1 cup of cooked rice (preferably day-old rice)
    • ½ cup of kimchi (chopped)
    • 1 tablespoon of kimchi juice (optional, for stronger flavor)
    • 1 tablespoon of cooking oil
    • 1 teaspoon of sesame oil
    • 1 teaspoon of sugar (optional, to balance the sourness)
    • ½ tablespoon of soy sauce
    • 1 egg (fried or scrambled, for topping)
    • Green onion and sesame seeds for garnish

    🔥 How to Make It

    1. Heat oil in a pan over medium heat.
    2. Add chopped kimchi and stir-fry for 2–3 minutes until fragrant.
    3. Add rice and mix well with the kimchi.
    4. Season with soy sauce, sugar, and kimchi juice. Stir-fry for another 3–4 minutes.
    5. Finish with sesame oil for a rich aroma.
    6. Top with a fried egg and sprinkle sesame seeds and green onions.

    🍳 Tip

    If you like it spicy, add gochujang (Korean red chili paste) or hot pepper flakes.
    You can also add ham, spam, or bacon for a smoky flavor — this is actually how many Koreans enjoy it at home!


    💬 Closing

    That’s it! Your simple and authentic Kimchi Fried Rice is ready.
    Enjoy it with a glass of cold water or Korean soup on the side.
    Try this once, and you’ll see why it’s one of Korea’s most-loved comfort foods!

  • 🧀 Korean Street-Style Hot Dogs Recipe 🇰🇷

    (Crispy outside, chewy inside, with gooey cheese!)

    If you’ve ever walked the streets of Seoul, you’ve probably seen Korean-style hot dogs — golden, crispy, and covered in sugar with cheese stretching for miles! 😋
    They’re not your typical American corn dogs — these have a chewy dough, crispy coating, and sometimes even potato cubes on the outside.

    Here’s how to make them easily at home!


    🛒 Ingredients (for 4 hot dogs)

    For the batter:

    • 200g all-purpose flour
    • 2 tbsp sugar
    • ½ tsp salt
    • 1 tsp baking powder
    • 1 tsp instant yeast
    • 150ml warm milk
    • 1 egg

    For the filling:

    • 4 sausages
    • 4 mozzarella cheese sticks
    • 4 skewers

    For coating:

    • Bread crumbs (or panko)
    • Optional: Diced potato pieces
    • Cooking oil (for frying)

    For topping:

    • Sugar
    • Ketchup, mustard, or cheese sauce

    👩‍🍳 Instructions

    1. Make the Batter

    1. In a bowl, mix warm milk, yeast, and sugar. Let it sit for 5 minutes until it starts to bubble.
    2. Add flour, salt, baking powder, and the egg. Mix well until you get a sticky dough.
    3. Knead for about 5–10 minutes, cover with plastic wrap, and let it rise in a warm place for about 1 hour.

    2. Prepare the Filling

    1. Skewer the sausage and mozzarella together (half sausage, half cheese looks great).
    2. Place them in the fridge for a few minutes to help them hold their shape.

    3. Coat the Hot Dogs

    1. Once the dough has risen, roll small portions around each skewer to cover the filling completely.
    2. Roll the coated skewers in bread crumbs — or in diced potatoes if you want the famous potato hot dog version!

    4. Deep Fry

    1. Heat oil to 170–180°C (340–355°F).
    2. Fry each hot dog for 3–5 minutes, turning occasionally, until golden brown and crispy.
    3. Place on paper towels to remove excess oil.

    5. Add Toppings & Serve

    1. While still warm, roll the hot dog in sugar for that signature Korean street flavor.
    2. Drizzle with ketchup, mustard, or cheese sauce.
    3. Enjoy while it’s hot and cheesy! 🧀💛

    🌟 Tips & Variations

    • Potato Hot Dog: Add diced potatoes to the coating for extra crunch.
    • Cheese Bomb Hot Dog: Use extra mozzarella for a stretchy surprise.
    • Rice Cake Hot Dog: Replace the sausage with Korean rice cake (tteok) for a chewy twist.
    • Injeolmi Hot Dog: After frying, coat with soybean powder and sugar for a nutty, traditional taste.

  • 🌶 Unique Buldak Recipes – 3 Creative Twists

    “Plain Buldak ramen? Too ordinary.”
    Here are three spicy, creative ways to enjoy your favorite fire noodles 🔥


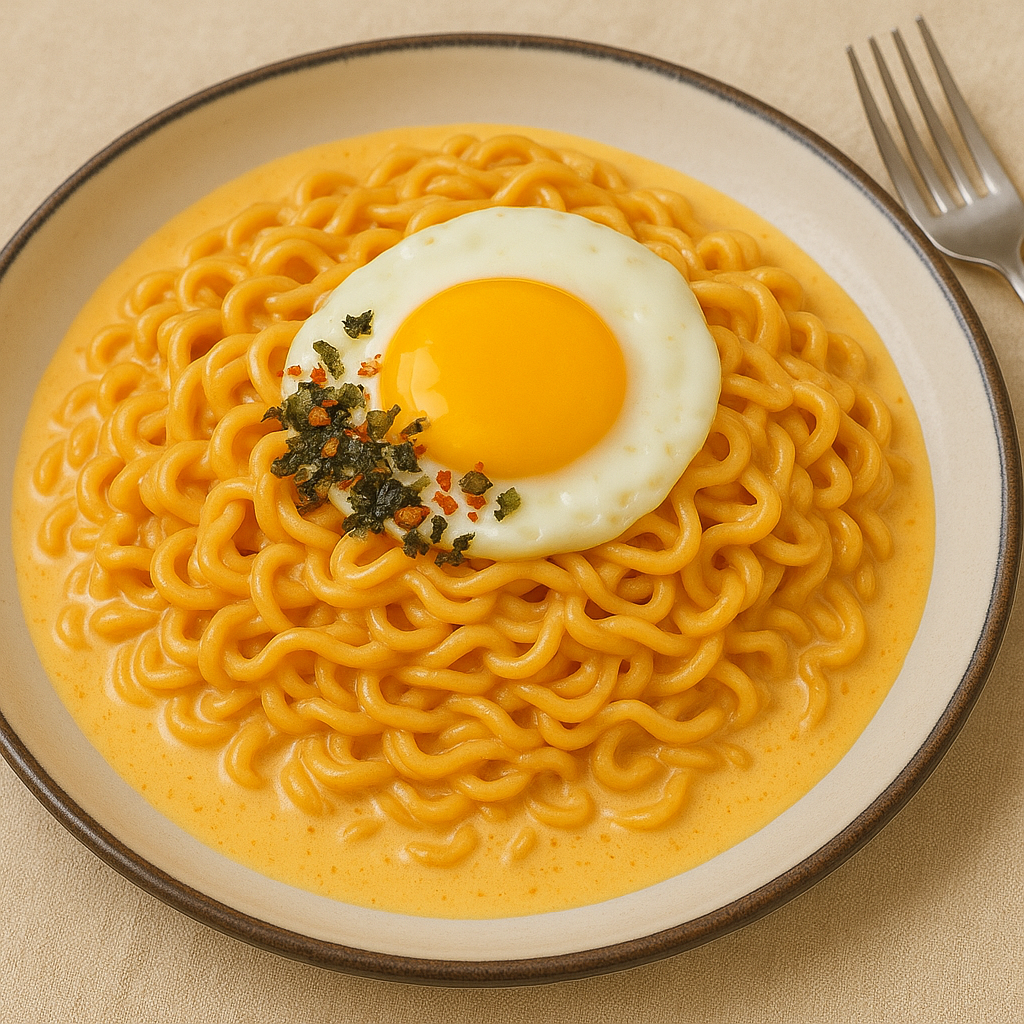
    Buldak Cream Risotto

    When the fiery Buldak meets smooth cream —
    It’s a love story between spicy and silky.

    🧂 Ingredients

    1 pack of Buldak ramen, 200ml milk, 1 tbsp butter, 1/4 onion (chopped),
    2 slices of bacon (chopped), parmesan cheese (optional)

    🍳 Instructions

    1. Boil the noodles 1 minute less than usual.
    2. In a pan, melt butter and sauté onion and bacon.
    3. Pour in milk and let it start to bubble.
    4. Add half the Buldak sauce and mix well.
    5. Add the noodles and simmer until the sauce thickens.
    6. Finish with parmesan and seaweed flakes ✨

    💡 Tips

    • The balance between creamy and spicy is perfect!
    • Add a soft egg yolk on top for that aesthetic touch 💛

    Buldak Omelette

    “What if Buldak hides inside a fluffy omelette?”
    A spicy surprise wrapped in soft eggs — oddly addictive.

    🧂 Ingredients

    1 pack of Buldak ramen, 3 eggs, 2 tbsp milk, 1 slice of cheese, a bit of butter

    🍳 Instructions

    1. Cook Buldak noodles, then stir-fry with half the sauce.
    2. Whisk eggs with milk, and cook gently like scrambled eggs.
    3. Place noodles in the center and wrap with the egg.
    4. Garnish with ketchup or mayo, and parsley 🌿

    💡 Tips

    • The egg’s subtle sweetness balances the spice beautifully.
    • A drizzle of tomato sauce adds another layer of flavor!

    Buldak Kimchi Pancake

    “Buldak… in a pancake?!”
    Crispy outside, spicy inside — the ultimate snack or beer companion 🍺

    🧂 Ingredients

    1 pack of Buldak ramen, 1/2 cup kimchi (chopped),
    5 tbsp pancake mix, 3 tbsp water, cooking oil

    🍳 Instructions

    1. Chop the kimchi and pre-cook the noodles slightly.
    2. Mix everything in a bowl to make a thick batter.
    3. Pan-fry in plenty of oil until golden brown on both sides.
    4. Sprinkle sesame seeds and seaweed flakes on top!

    💡 Tips

    • The tangy kimchi and spicy Buldak sauce are a perfect match.
    • Great way to use leftover noodles too!

    ✨ Final Note

    “Buldak ramen isn’t just instant noodles.
    It’s a canvas for creativity — where heat meets imagination🔥”

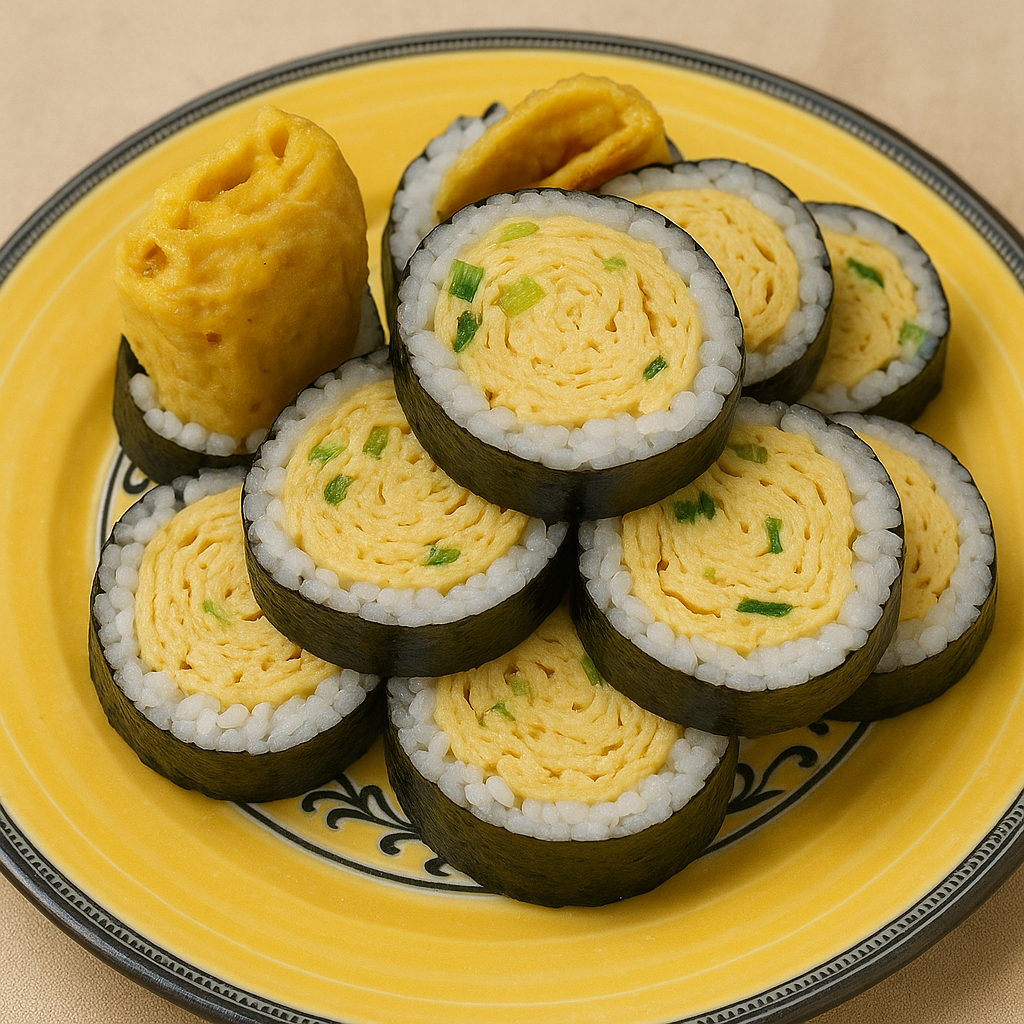
  • How to Make Fluffy KOREA Egg Bomb Gimbap

    Today, I’m sharing my recipe for Egg Bomb Gimbap — soft, fluffy, and full of savory egg flavor.
    You don’t need to deep-fry anything; it’s simple, light, and absolutely delicious. Perfect for lunch or a picnic! 💛


    🌿 Ingredients (for 2–3 rolls)

    • 2–3 bowls of cooked rice
    • 3 sheets of roasted seaweed (gimbap nori)
    • 6 eggs
    • A pinch of salt
    • 1 tsp sugar (optional, for a subtle sweetness)
    • 2 tbsp milk (for a softer texture)
    • Cooking oil
    • Gimbap fillings: pickled radish, ham (or crab stick), spinach, sautéed carrots, burdock root, etc.
    • 1 tbsp sesame oil, toasted sesame seeds

    🍚 Prepare the Rice

    1. Mix the warm rice with a pinch of salt, 1 tbsp sesame oil, and a sprinkle of sesame seeds.
    2. Let it cool slightly — this keeps the seaweed from getting soggy.
    3. The seasoning should be mild so the egg flavor stands out later.

    🍳 Make the Fluffy Egg Roll

    This is the key to the “bomb” look!

    1. Crack 6 eggs into a bowl and whisk well with a pinch of salt, 1 tsp sugar, and 2 tbsp milk.
    2. Heat a lightly oiled pan over low heat.
    3. Pour in a thin layer of egg mixture and roll it up slowly, repeating the process to make a thick, layered egg roll.
    4. Once cooked, let it cool slightly before slicing to the length of your gimbap.
      (Cutting while hot can cause it to break apart.)

    🥢 Assemble the Gimbap

    1. Place a sheet of seaweed on a gimbap mat and spread the rice evenly, leaving about 2 cm at the top edge.
    2. Lay the thick egg roll in the center along with your fillings (ham, radish, spinach, carrot, etc.).
    3. Roll tightly with firm pressure using the mat to shape it neatly.
    4. Brush a little sesame oil on the outside and sprinkle some sesame seeds on top.

    🔪 Slice and Serve

    Wet your knife slightly and cut the roll into 1.5–2 cm thick slices for clean edges.
    The bright yellow egg in the center gives it that soft, “bomb-like” look 💛

    Serve with a drizzle of mayo, ketchup, or sweet chili sauce if you like.


    💡 Tips

    • Always cook the eggs over low heat so they stay tender and fluffy.
    • Keep the fillings simple — this lets the egg flavor shine.
    • Great for lunch boxes, picnics, or a light homemade meal.

    Soft, colorful, and full of flavor — this Egg Bomb Gimbap is a fun twist on the classic roll.
    One bite and you’ll taste that warm, fluffy goodness that feels just like home 🥰

  • How to Make Tuna Kimbap (Korean Tuna Rice Rolls)

    Tuna Kimbap is simple to make but getting the right balance of flavor and texture is key. Here’s how to make delicious rolls at home!


    🥢 Ingredients (for 3 rolls)

    • 3 sheets of seaweed (gim)
    • 2 bowls of cooked rice
    • 1 can of tuna (about 100g)
    • 2 tbsp mayonnaise
    • 3 strips of pickled radish (danmuji)
    • ½ cucumber (cut into long thin strips)
    • ½ carrot (julienned and lightly stir-fried)
    • 2 eggs (made into a thin omelet and sliced)
    • Optional: kimbap ham or crab sticks
    • Salt, sesame oil, and sesame seeds

    🍚 Seasoning the Rice

    1. Mix 2 bowls of warm rice with:
      • ½ tsp salt
      • 1 tbsp sesame oil
      • A sprinkle of sesame seeds
    2. The rice should be slightly firm, not mushy, for a better roll.

    🐟 Preparing the Tuna Filling

    1. Drain the oil from the tuna completely.
    2. Mix it with 2 tbsp mayonnaise and a dash of black pepper.
      • For extra flavor, add a little chopped onion or pickle if you like.

    🍳 Prepping the Other Ingredients

    • Make a thin egg omelet, slice it into long strips.
    • Lightly stir-fry carrot strips with a pinch of salt.
    • Sprinkle salt on cucumber strips, let sit briefly, and squeeze out excess water.
    • Use pickled radish as is.

    🍙 Assembling the Kimbap

    1. Place a sheet of seaweed on the bamboo mat.
    2. Spread a thin layer of rice evenly, leaving about 2 cm (1 inch) at the top.
    3. Arrange the fillings in the center:
      Pickled radish → Cucumber → Carrot → Egg → Tuna mayo.
    4. Roll it up firmly, pressing gently with the mat as you go.
    5. Seal the edge with a bit of water or sesame oil.

    ✨ Finishing Touches

    • Lightly brush the outside with sesame oil for shine and flavor.
    • Slice the rolls with a sharp knife.
      (Tip: Wipe or oil the knife slightly so the rice doesn’t stick.)

    💡 Tips for the Best Tuna Kimbap

    • Don’t overfill with tuna mayo — it may burst when rolling.
    • Add a bit of chopped chili pepper if you want it spicy.
    • If refrigerated, reheat briefly in the microwave (about 15 seconds) before eating for a softer texture